DIY Nail Polish Shelf
/We moved into our forever home recently, and my wife has been organizing her closet. She needed a place to put her nail polish and asked me if I could replicate something she saw on Pinterest. The classic example of “I can make that better and cheaper” than the online purchase option, and this time it worked out exactly like that. I was able to use some scrap red oak lumber I had in the shop, designed the shelf to hold more nail polish than the ones online made out of 1x3s, and make it for essentially nothing.
Simple ladder construction
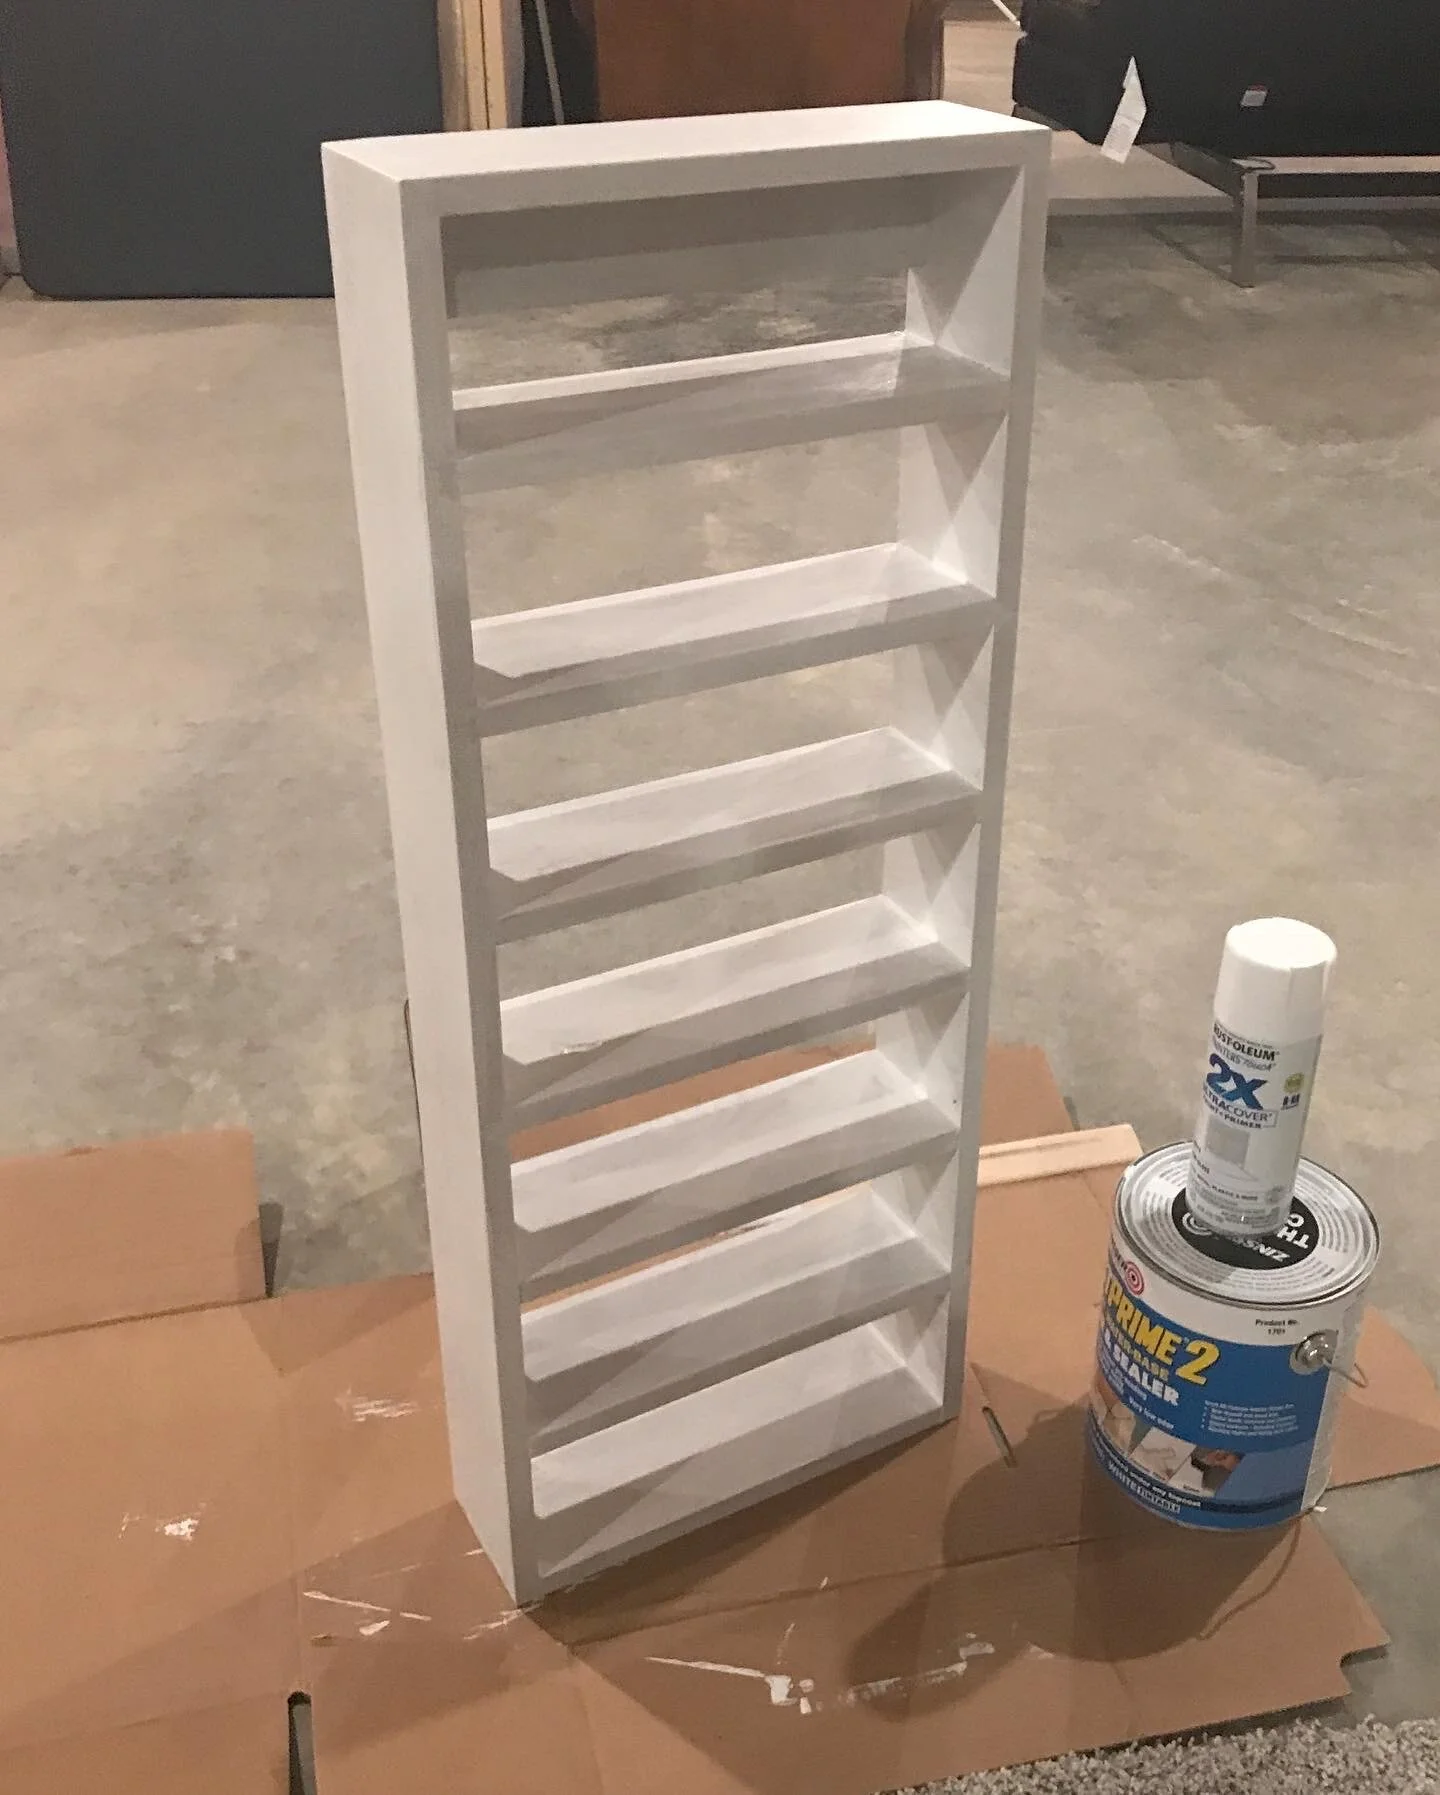
The basic construction of this nail polish holder is just a ladder, a small ladder with small gaps between rungs. I cut down the red oak to 4 inches wide, and then cut everything to length and then connected them with screws which I will hide with spackle and paint. The size allows for three nail polish bottles to be stacked on the shelves, creating a huge amount of storage in a pretty small space. This was also sized to fit behind the closet door, utilizing space that would normally go wasted. I added a vertical stretcher at the top of the unit to allow me to screw the unit into the studs, creating a rock-solid installation.
Primed and painted
Our home has white painted trim and cabinets, So I primed and painted the nail polish holder to match. I used Zinsser water-based primer for the first coats, and then covered it with semi-gloss spray paint from Rustoleum for a super smooth final topcoat. With the winter set in here in Indiana, I had to paint in the basement, which isn’t the best option, but it allowed the paint to dry evenly compared to trying to do it in the cold garage shop.
Painted and ready for installation
Installation was easy. I found the studs on the wall with a stud finder, counter sunk holes in the upper vertical stretcher to allow for screws, and attached it to the wall. I’m confident that the installation will hold the weight of the nail polish bottles once in place.
Final installation
Make It Your Own→
/I’m honored to have been featured in a great blog article by the Northeast Indiana Regional Partnership about passion and craft in Fort Wayne. It’s part of an ongoing series of how people in Northeast Indiana are contributing to the growth and expansion of the area in economic, cultural, and other ways.
Throwback to turning a pen for my father made from my grandfather's bench
/A year and a half ago I spent some time to make a special gift for my dad. I turned a pen from the wood I salvaged from my grandfather’s workbench.
It was a special project that means a lot to me as I was able to give a memory to my dad that will hopefully last a lifetime.
Willow Salad Bowl
/This 14 inch salad bowl was made as a Christmas gift commission.
It is made from a spiral willow tree cut down in Fort Wayne, IN in October 2018. It was once turned the day after it was cut down and then dried until the beginning of December 2018 when it was twice turned and finished with a good safe walnut oil finish.
Dovetailed Boxes for Level Storage
/I was fortunate enough to get an additional commission for custom tool boxes, this time a set of dovetailed boxes to hold some supper high end Starrett levels with precision that I can’t even fathom.
I went with figured ash for the long sides and walnut for the ends, and used some purple heart given to me by the client for the smaller boxes top and bottom panels.
All of the dovetails were hand cut and hand chiseled, and it was a real pleasure, and challenge to make these boxes. Details like the dovetails always have to have your full attention, as any mistakes are out in the open.
Custom Boxes for High End Starrett Tools
/Custom Boxes
for High End Starrett Tools
It is an amazing feeling when you are asked to fulfill a customer's vision, and you succeed!
I was asked to build custom tool holder boxes for precision Starrett tools for a machinist in Fort Wayne. I was honestly intimidated by the whole idea because I felt like my work wouldn't be up to the level the customer expected, as well as the fear that my work wasn't worth what I was asking to be paid.
My fears were unfounded as I plowed through the project, including having to re-cut the sides of the largest box because of a mistake in the first few steps. I was able to build three beautiful boxes (with their own errors and mistakes) using new techniques, hardware, and tools which turned out good enough that the customer asked for two more boxes at delivery!


